Showing posts with label C16. Show all posts

Wednesday, February 7, 2024

Calculator for Commodore 64 and other CBM BASIC models


Introduction

Wow! A new desktop calculator for Commodore.  Programmed all by myself in BASIC.  Wow, so impressed!   Or not.  Doesn't even have decimals.

No, it's not the best thing since sliced bread, but it was fun.  And it's just a start -- there's a bigger goal I'll get to in a while...

This was a puzzle programming exercise I challenged myself with.  How to make the calculator, especially with the operator precedence feature.

Link: LOAD"CALC64",8

Implementation

Let's go through how it was implemented.

User Interface

First was the design of the user interface, by creating PRINT statements.  Used reverse text to make a rectangular box with the keys displayed.

How to click on a key?  I'm so used to a mouse or touch interface.  Oops, Commodore doesn't have that usually, or not so easy.  Ignoring the 1351 mouse for now.   Most Commodore users are used to using the keyboard or joystick.  Forget the joystick, this is not a game!  Keyboard entry one key at a time will do just fine.  Note that ENTER also acts as =, and DEL is equivalent to ←, and X is a synonym for *.

Entry of digits was the first processing, accepting up to the limit of the display.  This stored as a string (V$) with keyed entries appended.

I started with 7 digits, but outgrew that in testing and increased to 9 digits.

At first, only positive numbers were supported, then fixed it to support negative numbers, with the negative sign taking up a position in the display.   The N key toggles a number entry between positive and negative and back again.

Entries allowed by this calculator are interleaved numbers and binary (two argument) operators.  Note that immediate operators like C and N usually take effect immediately, whereas binary operators require multiple arguments and a finalization (another binary operator or =).

There are exceptions allowed in entries to overwrite the prior value or the prior operator.   Examples:

  • 1+1=3 keyed entries will replace the 2 with a 3
  • 2+x3 will replace the addition operator with multiplication operator

Precedence needs a Stack

One design requirement I set for myself was to include operator precedence.  This means that multiplication and division have the same higher precedence over addition and subtraction at the same lower precedence.  Usually math is evaluated left to right, but due to precedence issues, other operators may need to be done first.  In other words the expression 1+2x3 is equivalent to 1 + (2x3) and then 1 + 6 and finally evaluates to 7.   But 1 x 2 + 3 is equivalent to (1x2) + 3, then 2 + 3, and finally 5.

I simply put numbers and operators interchangeably on a stack in order of entry until enough information is present to start evaluating.

Rule 1 - if user presses =, then evaluate

Rule 2 - if first operator is multiplication or division, once the second number is finalized with a second operator, simply evaluate the first expression

Rule 3 - if first operator is addition or subtraction, defer until the second operator and third number is finalized (third operator present!), then figure out what to do - either evaluate first or second expression, reducing the work

The stack is implemented as a count C, and an array of strings S$, which is expected to only grow up to 6 items (0..5), example C=6, S$[0]="1" [1]="+" [2]="2" [3]="*" [4]="3" [5]="+"

This example 1+2*3+ is reduced to 1+6+ and then to 7+, with the display updated to show the 7, but then wiped to disallow appending to it.


And no, I'm not doing RPN.  I didn't grow up with an HP calculator, nor am I implementing one today.  I grew up with Texas Instruments, and that's how my brain works.   Keeping it in entry order keeps it orderly for me.  Sure, there are other was to approach it.   This is BASIC, not Lisp.  And this is MY calculator, so I'm doing it MY way.  Others can follow their own paths.

Expression evaluation includes handling the equals = operation.  In the context of this calculator, that finalizes a calculation, meaning the user wants the result now.

Subroutines

There are several subroutines: 1) Evaluate and reduce stack, 2) Update display, 3) Display stack, 4) Evaluate simple expression involving two numbers and an operator.

That last subroutine is a diagnostic useful most for development, but also shows work in progress compared to a regular simple desk calculator that usually won't show pending work.

Error conditions

Overflow is when the number to be displayed doesn't fit in the 9 digit display, when the string representation of the number is long than 9 characters and/or larger than the maximum whole integer value that can be displayed in that space.   Note that the number is still internally represented and can still be acted on.  If a resulting answer can be displayed it will be (example: divide a ten digit positive number by 10).

Error indicates that division by zero was attempted.

Limitations

Only integers are supported.  No decimal numbers.  No currency.   Workaround required to calculate a percentage -- multiply by one hundred first, then divide by whole percentage.  And division results in a whole number so 1/3= results 0, and 5/2= evaluates to 2.

Non-negative numbers are limited 0 to 999999999 (nine digits).  Negative numbers are limited -1 to -99999999 (note only 8 digits).

Scientific notation is not supported.

No paper tape, no printout, no record of operations.

Limited user feedback.  No keypress indicators.

Stack diagnostic is a little technical, especially with a count, then colon, and the entries.  (Could eliminate the count and colon, and/or show previous and pending operators before and after the display.)

Keyboard entry.

Extras

The program was saved with a starting address $400, to support PET, so you must not load with secondary address 1 on a C64!  And while the program assumes a screen bigger than a VIC-20, a few minor changes to the margin and startup text can remedy that.

Next

What does the future hold?  Who can predict with any accuracy?  I can say anything here, but doesn't mean I'll follow through.  I originally was contemplating near limitless number of digits (considering the 8-bit platform, probably some 16-bit limitation).   Maybe binary and hex?   Maybe a scientific calculator?   Fixed decimal?   Near limitless decimals?   Port to assembly for fun!   We'll see...

Have fun calculating!

Saturday, May 14, 2022

GO 128 enhancement for Commodore


One wonderful feature of the Commodore 128 was its compatibility with the Commodore 64.  It was an evolution of the Commodore 64 and still supported all the software and hardware from before.  For me it was a no-brainer to buy.  80 columns, plus new features, plus CP/M.   Adding a mouse, GEOS 128, REU 512K, and 3.5" floppy, and I thought it was the best place to be this side of heaven.

There were multiple ways to go into Commodore 64 mode.

  1. Start with a Commodore 64 cartridge
  2. Boot/reset with the Commodore key held
  3. Commodore 128 boot disk that switched to Commodore 64 mode
  4. Switch MMU to Commodore 64 mode
  5. GO 64 command
But the only way to get back into Commodore 128 BASIC 7.0 was to reset the system.


Fast forward a few decades or so, and now we can add GO commands to the other BASIC systems to switch between them.  Links: cross-platform source, Windows binary release.

How does it work?  This is emulation.  Sorry purists.   The Commodore 128 MMU was built so there is no going back out of C64 mode.  This was by design to keep 64 mode on the 128 very close to 100% compatibility.  But emulation?  Anything goes.  The GO command is hooked, the argument is checked for a number, and if the number is right, it goes to that Commodore model by restarting the emulation for that system.  And thus, when running the BASIC for one system, can quickly switch to another other system (or even reset the system) using the GO command.  It even prompts for amount of RAM to allocate (except 128 is fixed at 128).

PET 2001 2K to 64K supported 
Vic-20 5K to 40K supported in hardware supported increments, not all available to BASIC
64 RAM 3K to 64K supported not all available to BASIC
Commodore 16 and Plus/4 support 16K, 32K, or 64K
Commodore 128 fixed at 128K (KERNAL does not do RAM test) 

Limitations?  Oh, sorry.  This emulator is text only.  No full screen editor.  Doh!   No screen pokes either (well not displayed).  [Update 6/2021:] PETSCII and commodore graphics characters supported with third party font.  Does support console history editor on Windows.   Linux and MAC builds (you can build from my open source project) provide only simple line editing capability.   Does provide accurate 6502/6510/8502 emulation, RAM banking, etc. according to the platform.   So pop into the MONITOR on C128 or C16, Plus/4, or SUPERMON on other platforms to write and edit machine code.   And because using console window, the text display size is not as limited, 88 columns for Vic-20 and 160 columns for C128.


Save and Load from .PRG is supported as well (except PET at this time, some other limitations).  Disk device is ignored, so defaults to local file system.  Even use absolute and relative paths.

So for simple programs, and just playing around in BASIC, it's not too bad.   Text background and foreground color for Vic-20 is enabled because that color palate is more compatible with the Windows console default colors.  Reverse text should work on all systems.  Home, clear, cursor positioning may work in programs only, not for editing.


Now prompts for RAM size going to 64


Going to Vic-20 from 64


Going to PET 2001 from Vic-20


Going to Plus/4 from Vic-20

Going to Commodore 16 from Plus/4


Going to 128 from Commodore 16

Resizable text console - 132x50 text screen on Commodore 128

Bil Herd, Ted/C128 hardware design project lead (left) and Dave Van Wagner, geek (right)


Links: 

Sunday, April 25, 2021

Low Resolution Graphics for Commodore

Commodore systems come with a graphical character set that can be used for low resolution graphics.

PETSCII low resolution 80x50 example

All the Commodores include block patterned graphics that can be used to display 2x2 pattern blocks, to double both the horizontal and vertical text resolution, for example from 40x25 to 80x50.  Like 4K for the day!  

PETSCII block characters including inverted

In the back of our high school math classroom was an original PET 2001.   This system had a chicklet keyboard, built-in cassette drive, and 40 column white on black monochrome screen.  This system has no graphics modes beyond the PETSCII capabilities.

One of the exercises in my Algebra 2 class was to graph mathematically functions.  I successfully challenged myself back then to plot the graph on the PET using this block graphics method.

Using 8 PETSCII characters, and the inverse of those characters, all 16 combinations of the patterns can be achieved by setting (POKE) the correct value onto the screen (see the A array in the source).  Also achieved is reading (PEEK) the current PETSCII value, converting that into pixel data, and combining existing plotted pixels with a new pixel (see the B array in the source).

LORES PET 40COL listing

My handwritten PET listing from 1982

I found my handwritten program listing that dates back to 1982.  It's beautiful to see that graphics could be achieved with PETSCII with only a few lines of code.  From my positive experiences with the PET, I purchased a Commodore Vic-20, and the Super Expander later in 1983 and switched to high resolution graphics at that point.

A disk image (D64) of samples for PET/Vic-20/C64 is available.  Screen memory locations for PEEK/POKE are different for all the systems, and sizes are adjusted with variables for the 80 column PET, and 22 column Vic-20.  The Vic-20 and C64 also have color memory, so an additional POKE is included to match the current text foreground color (PEEK(646)).  

Update [5/13/2022] there are ports for both Commodore 128 40 column screen, Commodore 128 80 column screen (including SYS calls to read/write VDC 8563), and a port to the TED (C16, Plus/4) series systems showing a color gradient possible with those systems.

Disk Listing for different Commodore Models

Vic-20 low resolution 44x46 plot

Contrast with 320x200 high resolution from C64

PET 80 column screen 160x50 sample

[Change:] 80 P=COS(I)*SIN(I)*2

Commodore 16, Plus/4 screen 80x50 sample (TED)

Sunday, January 17, 2021

How to Build Vice 3.5 (x64sc, etc.) on Raspberry Pi 400

Raspberry Pi 400


The Raspberry Pi 400 invokes a sense of nostalgia back to the all-in-one systems of the past, such as those commonly available in the 80's (about 40 years ago!) of having the keyboard and computer all in one, with connections at the back of the enclosure, and expansion at the back of the enclosure.

My favorite system released January 1982 was the Commodore 64.

So why not have both?  With emulation, let the Raspberry Pi 400 become a Commodore 64 as well.

Vice 3.5 built, running on Raspian

One way to do this, is using Vice (the Versatile Commodore emulator).  Of course you can use a prepackaged solution like Retropie and Emulation Station.  But since it is open source, you can also just download and build the source yourself.

As vice 3.5 was just released Christmas Eve, 2020, it makes a lot of sense to build yourself, so you can have the latest build relatively easily.  Just think of all those new features!!!

I've attempted this myself on my Raspberry Pi 400 (and expect should work on others fine too) with Raspian.  I've tested with both the latest 32-bit ARM, and beta 64-bit ARM builds.

Following are the steps I took to accomplish building the default configuration.  I followed the basic instructions, and when configuration or build failed due to a dependency, researched the dependencies necessary (thanks Google and all those who have built before me and posted their solutions).  

Grab yourself your favorite beverage, power up your Pi, and get building!   And once you're done, feel free to test my hires.d64 image.  Maybe even pick up some keyboard stickers.   And also can run Pet, Vic-20, Commodore 128, etc.

Summary

  1. Install dependency packages
  2. Download three archives from web: vice 3.5, SDL2, SDL2_image
  3. extract the archives to their respective directories
  4. configure, build, and install each iteratively in the order: SDL2, SDL2_image, vice 3.5
Full Steps (note versions may change, these were the ones available January 2021):

  • sudo apt-get install flex bison xa65 libgtk2.0-dev texinfo libxxf86vm-dev dos2unix libpulse-dev libasound2-dev
  • sudo apt-get install texlive-latex-base texlive-fonts-recommended texlive-fonts-extra texlive-latex-extra 


Monday, March 30, 2020

6502 emulator for terminal, Commodore Edition

(Update: Commodore 64, 128, VIC-20, PET, and Commodore 16, Plus/4 aka TED series)

This is a simple 6502 emulator.  And a very simple Commodore emulator.  If you like console windows and command lines, this may be your emulator, especially if you like both 6502 and BASIC.  And if you prefer C#, check out the emulator sources (link at end).


Simple

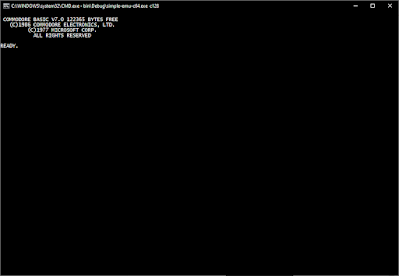
How simple is it?  It is so simple!  It turns out you can craft a 6502 emulator, hook just the character in/out routines, do a little memory management, feed it Commodore ROMs, and you've got a retro computer in a terminal (Windows Console in this case).  If you implement the 6502 accurate enough, it just works.

Commodore 64 and VIC-20 ROMs don't really care if there is any real hardware I/O available or not.  All memory is zeroed to begin with, and I've treated the I/O areas as RAM so the I/O values can be retrieved.  And it seems to work for booting the system.

The only two kernel JMP table entries patches are CHRIN ($FFCF) and CHROUT ($FFD2).  By intercepting CHRIN completely, the screen editor is bypassed, but by allowing the CHROUT to continue, screen memory is updated simultaneously to the Windows console.  Note that this emulation has lazily not implemented hooks to writes to screen memory, though you are free to implement this as you desire adding code to the SetMemory() method within the C64Emu, Vic20Emu, or other appropriate class.

The goal was to access the BASIC command line.  And using the Windows Console ReadLine(), we now get those history and editing features instead:  Home, End, Del, Backspace, Cursor Up/Down/Left/Right, etc.

If you're itching for some simple BASIC command line, including entering programs line by line, you are all set.  Until you want to SAVE, LOAD, VERIFY.  Sorry, not implemented (yet?  use the Windows clipboard for now).   Full LOAD/SAVE implementation exercise left to the reader.  ;-)   Yet, since it is a faithful 6502 emulator, if you can get your own machine code loaded, you can run that too.

Commodore PET 2001 series, Commodore 16 and Plus/4 (TED) emulators are available too, required some additional changes including RAM banking for the TED series.

Update (2020-04-14) Commodore 64 now includes banking support for RAM/ROM switching.

Update (2020-05-4) Commodore 128 support added including MMU support for banking, etc., yet skips the Z80 support.

Want to work with another system like an Atari 400/800 series, Apple II, BBC Micro, Atari 2600 cartridge, or NES ROM?  I'm not going to stop you.  The 6502 emulation is here to use.  Though the video game systems probably won't work well in a console.  Not sure what the minimal emulation is required to get BASIC working on the others.


Limitations:

  • Only keyboard/console I/O.  No text pokes, no graphics.  Just stdio.  No asynchronous input (GET K$), but INPUT S$ works.  No special Commodore keys, e.g. function keys, cursor keys, color keys, STOP/RESTORE, etc.  (Could improve this.)
  • No keyboard color switching.  No border or border color.  Text and background colors are implemented, but disabled by default because mapping to the standard console colors results in some fairly horrible color combinations.
  • No screen editing (gasp!) Just short and sweet for running C64 BASIC in terminal/console window via 6502 chip emulation in software
  • PETSCII graphic characters supported only as an option if you include petscii on the command line and use a third-party font C64 Pro Mono (note: has own individual license restrictions), otherwise without PETSCII only supports printables CHR$(32) to CHR$(126).  But does support CHR$(147) for clear screen.  Now also supports Home/Left/Right/Up/Down output characters too.
  • No timers.  No interrupts except BRK.  No NMI/RESTORE key.  No STOP key.
  • No loading or saving of files implemented (but Windows clipboard works!)
  • No cartridges.
  • No joysticks.
  • No sprites.
  • No graphics (you know this is a terminal/console window right?)
  • Yikes, that's a lot of no.  Seriously, it is a simple emulator.  Emphasis on simple.
  • Lightly tested.  Bugs are lurking! 


Trace Execution:

It is possible to trace some or all of execution by setting the Emu6502.trace to true, and it will produce debug output (see in your IDE, or capture with DebugView).  Note that this slows down the emulation significantly, but provides very good insight.   Registers and flags are shown to the left of the statement's disassembly, in their states prior to executing the statement.  Currently, referenced memory is not shown, that would be a good enhancement for the future.


Walk a ROM:

Another feature is the ability to walk a ROM method without actually executing anything.  It traverses all subroutines, and both cases of branches (not taking the branch first, then when exhausted, taking the branch).  Each statement is disassembled exactly once.  Note that JMP($00FE) or similar will probably disassemble as BRK, unless you specifically code loading memory (see C64Emu for an example).   Pushing values to the stack (say from a table) and using RTS is not supported, as the walk isn't executing anything or remembering variable assignment, so dynamically pulling values from specific entries in a table is not supported directly (but see C64Emu.Walk() that implements a workaround).

If you initialize enough low memory, and walk all the entry points including addresses from tables, then the disassembly should be a view to the complete code coverage possible (and some impossible branches and paths too).  Note it is recommended to pass the output to sort (shown below) so the code is organized in memory order.  You could effectively get a ROM disassembly (without data tables).  More work could be done to show the data tables and/or unreferenced code/bytes.

simple-emu-c64 c64 walk | sort | more
simple-emu-c64 c64 walk FF3D
simple-emu-c64 vic20 walk FFCF FFD2


Development Environment:

Developed in beautiful C# using Microsoft .NET Framework 4 in Microsoft Visual Studio 2017.  Should be portable to other languages without much difficulty (it really is a simple implementation).  And should be able to recompile on Mac or Linux with a minimum of changes if any.  Submit your pull requests if you do something cool that would be generally useful.  Or just fork your own version. 

History

So in the process of my retro binge session the last year or so, I did come across another BASIC for the console.  I remember at least reading it, maybe even trying it out.  But time passed.  And I was recently puzzled on how it actually worked.  Problem was, I couldn't find it, which caused me to be even more puzzled.  I googled and googled, but the keywords are so common, it is hard to sift through the results to find exactly the solution I was searching for.   So I pieced together memories and thoughts of how one would approach a solution.  I wrote down steps.
  1. Use C64 BASIC in existing VICE emulator to test tokenizing, and execution - validate entry points, memory usage, define API subset
  2. Emulate 6502 code on Windows
  3. Graphing techniques - capture code paths, variables used
  4. Convert 6502 machine code to C or other using graphing information
  5. Add optimization techniques
I used Compute!'s Mapping the Commodore 64 and VICE to find and test the code to tokenize a statement: $A579, code for adding/replacing a line of a program: $A49C, and to execute a statement: $A7E4.  And I made notes about more Commodore 64 memory map entries.

I also found an Internet archived copy of the 6502 (65XX) Microprocessor Instant Reference Card (that I probably have filed away somewhere in a box in my garage) and I was itching real bad to implement the emulator.  Now, I've implemented the 6502 emulator before, but if memory serves correctly, it was a long time ago, and the moment I was ready to test it, I kinda gave up on it.  I was ready to return to this challenge.  I needed to get over that hill.  I was determined.  I was obsessed.

And then I happened to search for the original solution on github.  Huh, yeah, I should have thought of that first.  Brain fart!  I found mist64/cbmbasic.   The statically recompiled BASIC console program and loader.  Works great!

But my obsession was in full gear, so I wrote the disassembler Thursday night, March 26, 2020, and wrote the emulator Friday all day, March 27, 2020.  I had a miscommunication with other members of my family -- they thought I was working.  But I was on PTO.   Guess I forgot to tell them.  I was present for the family -- working at the dining room table -- but my mind was full bore into my laptop getting this emulator going.  And sure enough, I was able to post a screen shot to Twitter after midnight, barely into Saturday, March 28, 2020, just over 28 hours start to finish, including some sleep.  I am so lucky to get a successful result after such a short time.

Did it actually work first time?  Definitely not.  I had to fix my implementation of the BIT statement, somehow some opcodes got deleted, had to fix some instruction modes, and continuously fixing the flag assignments.  The challenge was fun.

Put in a bit more polish, separate out the Commodore 64 code from the 6502, and I was able to post the source to Github Saturday night, March 28.

Sunday I was able to test the VIC-20 ROMs, and wow, those work too.  Posted additional changes to formally support those, and have command line arguments checked in Sunday, March 29.

Then checked in backspace support early Monday, March 30 before heading to my real world job of working at home (how convenient!).  Yeah Coronavirus going on and all that.  All the more reason to keep my head low and focus on something else.

Monday night March 30 I created this blog entry.  Okay, time to get more sleep.

Sleep, maybe some, but TED was bothering me.  Turns out it needed memory banking (damn you TED!) so there you go, revised the memory scheme from an array, to a C# class that each machine type can handle those accesses including banking support.  Watch out 128, I'm going to get you next.

Saturday April 4 I was able to fix some I/O issues, and check in TED (C16, Plus/4) and PET 2001 support.

What's next?  I'm toying with replicating the static recompilation, to C would work best for me.  Then I could test on various or select embedded hardware platforms I have in my possession (or did I say obsession?).  

And maybe even use one with an LCD, and modify the emulation to support the screen editor and hi-res graphics support, either hooked or emulated, and support file loading from SD.  

Then probably on to something else newly retro and exiting.  Have fun!

[Update: ported C64 emulator to C, and tested on ARM boards with MBED and Arduino.  Skipped the static recompilation, because easier not to, and keeps all the machine code 6502 compatibility.  No banking support in Arduino/ESP32 version though, so limited to RAM at 0000-9FFF, C000-CFFF, and color nybbles at D800-DFFF; in other words no RAM under I/O or under ROMs, and no character graphics ROM for Arduino yet -- code exists in other branches, so exercise left to user.]


Credits

Inspired by mist64/cbmbasic and RetroShield 6502
Compute!'s Mapping the VIC
VICE - the Versatile Commodore Emulator


External Links:

Open Source!  https://github.com/davervw/simple-emu-c64 (C#, follow links for C version)