Then I either didn't have documentation or otherwise couldn't show the work how I got to that point, and I was stunned, all I can remember is the professor walking off and leaving me without a way to recover, and even dropping off the description of the project to the proctor during my final exam didn't satisfy that section of my grade, and my evaluation (no grades at UCSC then) was very clear I had failed or underachieved in the project yet passed the class.
Evidently I missed something in the requirements and focused too much on the demonstration. Documentation was the farthest thing from my mind while the demo was everything. Lesson learned the hard way -- always cross all your i's and dot all your t's or something like that.
Okay, so what is all this? The course I took was an undergraduate computer graphics class. We quickly got into 3D projection graphics. The mathematics was covered in our course textbook and also in class. Our assignments were to take templates of code provided by the teaching assistant, fill in missing portions, and turn in the final code. Our target system (from memory) was either a SCO UNIX or Microsoft Xenix 386 system (I think it was Xenix) with separately attached graphics display (graphics library was ig, can't remember what that stands for). It did color of course, and had a resolution in the neighborhood of 512x512. The system did not have a concept of quick animation to my recollection.
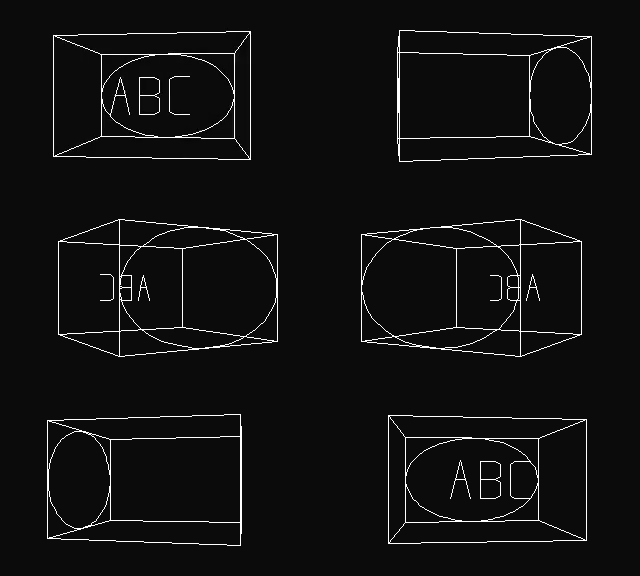
My project took our 3D graphics primitives built in my assignments, and built around them a scripting language to describe the scene and move through it, or move the objects, rotate the objects, or scale the objects, or a combination of all of these. Most of my demonstrations set up the object and rotate it around in 360 degrees. So I built on my compiler experience (lex/yacc) to build a reusable mini-language to do simple computer animation.
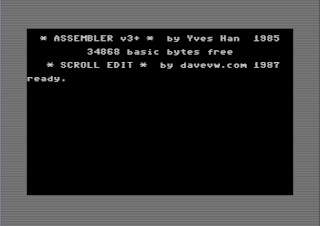
Now this is 30 years ago. Now we take 3D graphics for granted. We have software libraries and graphics hardware acceleration that can do polygons in the thousands, millions, billions. And all this code is doing is wire frame animation, not solid objects. Whoop de doo! Yeah, but it's doing it from scratch. And I built up my own graphics workstation software to replicate the lab experience, albeit in black and white and lower res (320x200). Hello Commodore 128! And Commodore 512KB RAM Expansion Unit (REU) for animation!
Most of these animations are 60 frames total (1 to 4 seconds), where the code was run on a UNIX system, converted to line graphics, downloaded to the Commodore 128 and rendered. I wrote the Commdore 128 software to render the graphics, and swap in/out of the REU for animation. Because the REU does DMA, the transfer is fast. Yeah, it's only 8Kbytes, but we're still talking a 1MHz or 2MHz 6502 based system, and with 60 frames, thats 480Kbytes total, more than the 128Kbytes on board.
Well here's the project fully documented now. Only it's 30 years late. This is the best, or one of my best, failures to date! Hope you enjoy.
My project took our 3D graphics primitives built in my assignments, and built around them a scripting language to describe the scene and move through it, or move the objects, rotate the objects, or scale the objects, or a combination of all of these. Most of my demonstrations set up the object and rotate it around in 360 degrees. So I built on my compiler experience (lex/yacc) to build a reusable mini-language to do simple computer animation.
Now this is 30 years ago. Now we take 3D graphics for granted. We have software libraries and graphics hardware acceleration that can do polygons in the thousands, millions, billions. And all this code is doing is wire frame animation, not solid objects. Whoop de doo! Yeah, but it's doing it from scratch. And I built up my own graphics workstation software to replicate the lab experience, albeit in black and white and lower res (320x200). Hello Commodore 128! And Commodore 512KB RAM Expansion Unit (REU) for animation!
Most of these animations are 60 frames total (1 to 4 seconds), where the code was run on a UNIX system, converted to line graphics, downloaded to the Commodore 128 and rendered. I wrote the Commdore 128 software to render the graphics, and swap in/out of the REU for animation. Because the REU does DMA, the transfer is fast. Yeah, it's only 8Kbytes, but we're still talking a 1MHz or 2MHz 6502 based system, and with 60 frames, thats 480Kbytes total, more than the 128Kbytes on board.
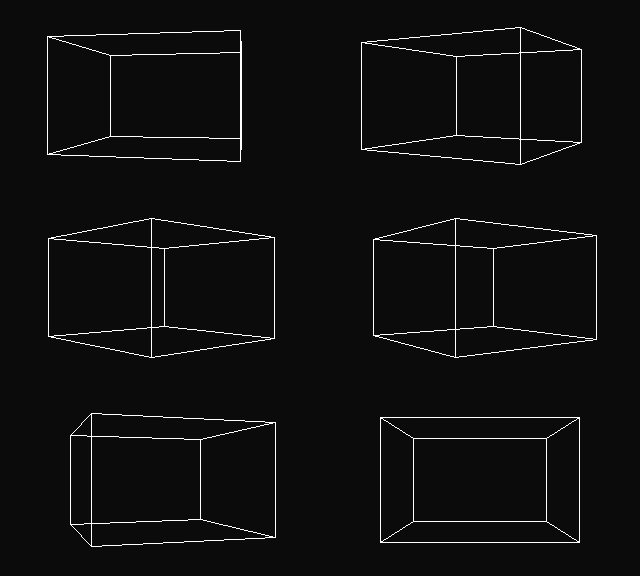
We start by defining an object. A simple one is 3dbox.obj
-100 -100 -100 100 -100 -100
100 -100 -100 100 100 -100
100 100 -100 -100 100 -100
-100 100 -100 -100 -100 -100
-100 -100 100 100 -100 100
100 -100 100 100 100 100
100 100 100 -100 100 100
-100 100 100 -100 -100 100
-100 -100 -100 -100 -100 100
100 -100 -100 100 -100 100
100 100 -100 100 100 100
-100 100 -100 -100 100 100
This is a 200 unit cube defined in 3D space with x,y,z coordinates space separated, one line of the box defined on each line of the file
scripts/06_box that animates this box looks like this
output bin
object "objects/box.obj"
translate z 0 y 0
eye 0 0 -500 0 0 0 0
window -200 200 -200 200 -200 200
viewport 0 511 0 511
repeat 60
draw
frame
rotate y 6
loop
quit
Now looking at this, I see I could have "cheated" and only rotated it 90 degrees, because the cube is the same on all sides. I proceeded to use this cheat in creating the gif with online tools. I leave it as an exercise to the user, hint: rotate at a finer pitch to get a finer animation. Note that the numbers are floats, so decimals are allowed.
And here is more description for the animation scripting mini-language
CIS 160 Project
David R. VanWagner
My project includes an enhancement of assignment 5. I changed it to use
a language with which most commands require a single statement, and
a repeat statement is used to generate animation. The instructions are
as follows:
help list commands
device, output change device type (ig,c128,bin)
eye set eye from,to,tilt
window set window extents xmin,xmax ... zmax
viewport set viewport xmin,xmax,ymin,ymax (0-511)
display turn c128 graphics display off,on
clear, cls, frame clear screen, next frame
draw draw on screen using current settings
quit, exit, done quit
set set current settings as default
reset reset to default settings
rotate rotate in x, y, and/or z
as in rotate x 30 y -20
scale scale in x, y, and/or z
translate, move translate in x, y, and/or z
bezier load bezier curve data, filename in quotes
repeat specify a number of times to repeat
loop until loop statement
(repeat/loop-s may be nested!)
object load object line data
input input commands from file
perspective turn perspective off,on
( perspective on is default )
The code is done in C with a lot of help from lex and yacc because of
the repeat/loop statements -> parses the code before it is executed, and
in the case of repeat/loop, lists of psuedo-code are made that are executed.
To allow me to do the majority of my work at home, most of my preliminary
work was done specific to my home computer. I wrote my own ADM-31 (not
3A!) terminal emulator some time ago, and added to it to turn it into a
graphics work station. Since the Commodore 128 has seperate RGB and composite
outputs, the setup is very similar to AS215 with text terminals and attached
graphics displays. I also added code to allow for saving video display
coordinate lines ( what is normally sent to the graphics display ) to a
file in a compressed format ( 34 bits per point: 9 bits each x, 8 bits each
y ) and then using a combination of BASIC and 8502 Assembly on the
Commodore, each frame is drawn and stashed in external DMA memory, then
fetched in sequence for the fast animation.
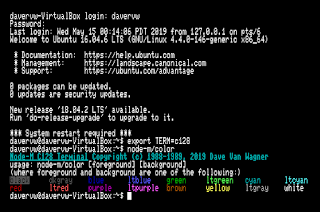
There's another piece missing. The c128 output device is actually when running in my own custom terminal emulator, to render in real-time to the secondary graphics screen (320x200 monochrome) while commanding UNIX over my 2400 baud modem in 80x50 text from the RGBI screen.
What I found out was that once you write your own terminal emulator, adding additional emulation sequences to do other stuff is a breeze. And there weren't that many new ones to add for graphics. My graphics terminal was running in no time! But in retrospect, I should have added flow control to slow down the UNIX system. It probably would have been as easy as a ^S when receiving a graphics command, and ^Q when finished rendering it.
Having the real-time graphics allowed me to render a single frame on the screen to make sure I was doing the right thing. Then I would switch to bin format to output to a file on the UNIX system, and then file transfer to my floppy drive (can you remember those!!!) and then run other programs to render to the DMA memory and replay quickly for animation.
Disclaimers to folks. Except for the first 5 input files (mostly the MIG-25 planes), the other renders I did now in the present in reconnecting with this project. And I ran all my recent tests and development with Vice 3.3 on Windows 10 using both cygwin and Ubuntu as my "UNIX" systems. Also there's a bug somewhere in my code! It craps out on the 64th frame. Probably something stupid. Anyways 60 is a more round number for 360 degrees anyways. Also I haven't matched loadbin.src to the machine language version in animate.bas. I suspect they are the same, just trusting 30 year old bits.
Another tip is that I created an AWK script for combining named points and named lines into a 2D object. Add another AWK line, and you can place it in 3D. Here's an example:
File abc.v defines the points
a1 -40 -30 -100
a2 -35 0 -100
a3 -30 30 -100
a4 -25 0 -100
a5 -20 -30 -100
b1 -10 0 -100
b2 -10 30 -100
b3 5 30 -100
b4 10 25 -100
b5 10 5 -100
b6 5 0 -100
b7 10 -5 -100
b8 10 -25 -100
b9 5 -30 -100
b10 -10 -30 -100
c1 40 30 -100
c2 25 30 -100
c3 20 25 -100
c4 20 -25 -100
c5 25 -30 -100
c6 40 -30 -100
File abc.l defines the lines (between the points)
a1 a2
a2 a3
a2 a4
a3 a4
a4 a5
b1 b2
b2 b3
b3 b4
b4 b5
b5 b6
b6 b1
b6 b7
b7 b8
b8 b9
b9 b10
b10 b1
c1 c2
c2 c3
c3 c4
c4 c5
c5 c6
Then use objects/draw.awk to combine all these
cat abc.v abc.l | awk -f draw.awk > abc.obj
Then abc3d.v and abc3d.l were created from the previous files, resulting in abc3d.obj
There is also a commodore.awk and circle.awk to generate 2D objects, be sure to append a Z value and you can place them in 3D space. Also check out commodore.obj, and yes it is designed to the 1965 specifications, except for some aspect ratio stuff (if you're running in emulation, just resize the window until the slants are at right angles). Then again, the scale command could be used to help adjust the aspect ratio. Again, left to the student.
All the C128, UNIX, source, and animation files used in this project are provided at this link here, and be sure to check out the node-m terminal emulator with its graphics capabilities as well. There are also 7 more sample animations on the disk not displayed here.


